
Setting up Internal DNS
📝 Notes:
- In this tutorial I’m working with Container ID of 400 and a local network of 192.168.0.XX. I chose a static AdGuard IP of 192.168.0.40. I named the container “AdScale” which is also its hostname in all networks. All of these values are up to your own setup.
- I refer to the virtual Tailscale network as Tailnet, per Tailscale’s own documentation.
📃 Prerequisites:
- We are working with LXC containers in Proxmox because this is the easiest way to separate AdGuard and Tailscale from the rest of the system but you can do this on bare metal or inside Docker.
- A free-tier Tailscale account.
- A server with a reverse-proxy, connected to your Tailnet, that AdGuard will point traffic to. Otherwise there is no point in setting up a custom local DNS, you can just use AdGuard’s MagicDNS.
⚠️ Gotchas:
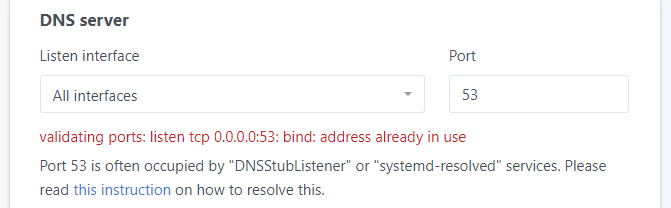
The trick here is to do everything in the proper order and make AdGuard listen to the correct interface for DNS requests. By default it tries to listen to all interfaces. However some of them (Like 0.0.0.0:53) might be already occupied. To finish the Setup you will be forced to use only one interface from the dropdown. Guaranteed, that won’t be the Tailscale interface. It means that even if you connect AdGuard to your Tailnet and set it as the DNS, no queries will be answered.
Step 1: Install AdGuard with TTeck’s scrips.
Open your Proxmox host console and execute the following command:
1
bash -c "$(wget -qLO - https://github.com/tteck/Proxmox/raw/main/ct/adguard-v3.sh)"
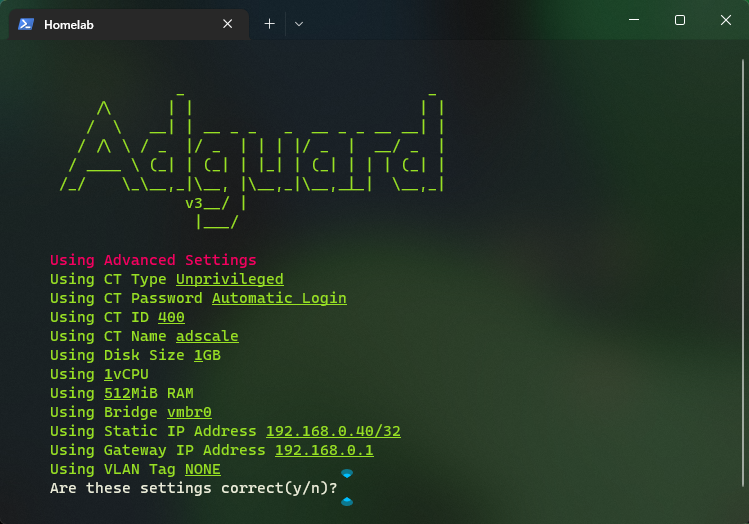
Select the advanced settings and specify CT ID, Static IP with CIRD of /32 and the Gateway.
Wait for AdGuard to install but DO NOT proceed with the Setup process at http://192.168.0.40:3000 yet!
Step 2: Install Tailscale with TTeck’s scrips.
Immediately install the Tailscale client in the AdGuard container. Again, use your Proxmox host console to execute the command. You have to specify the CT ID of the AdGuard container you just created. In my case it’s 400
1
bash -c "$(wget -qLO - https://github.com/tteck/Proxmox/raw/main/misc/add-tailscale-lxc.sh)" -s 400

As instructed, reboot the container.
Step 3: Connect the Tailscale client to your Tailnet
The Tailscale client is installed but you are not connected to any network with it, therefore you don’t have an IP. In order to connect, open the AdGuard container console and execute:
1
tailscale up --accept-dns=false
The flag --accept-dns=false will prevent Tailscale from forcing it’s DNS configuration upon this client. This flag is applicable to any client that does not need to resolve domains via this AdGuard instance.
You will be prompted to visit a Login screen at Tailscale.com where you will be authenticated against your Tailscale account and connected to your Tailnet. 
A quick check of ip addr in the AdGuard container console before and after, shows the following:
Before connecting to Tailscale 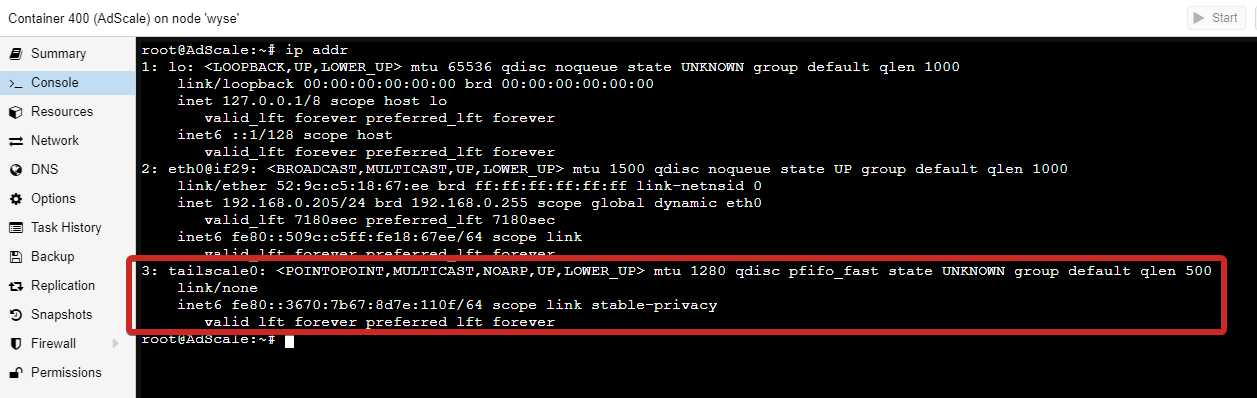
After connecting to Tailscale. Notice we have an IP now - 100.71.104.26 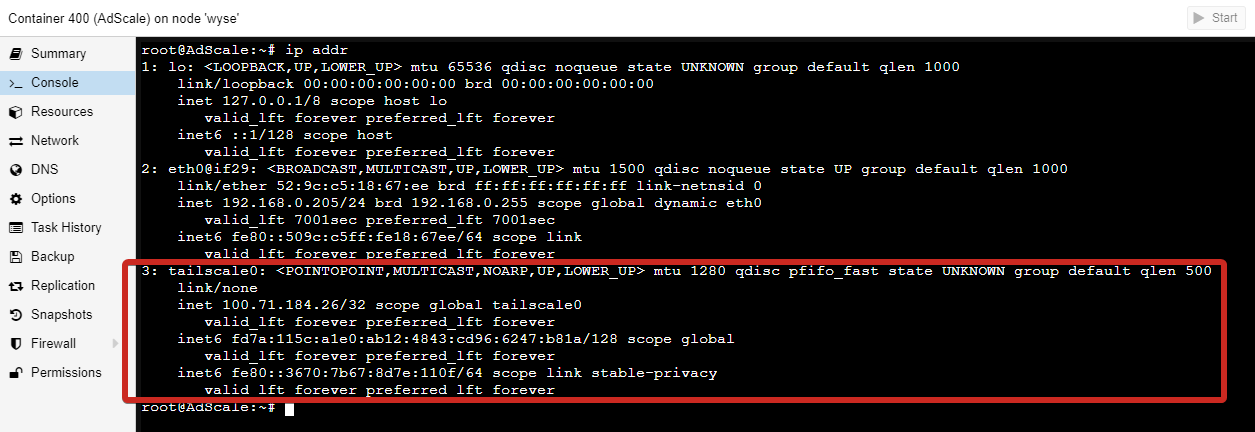
Step 4: Configure AdGuard to respond to Tailscale
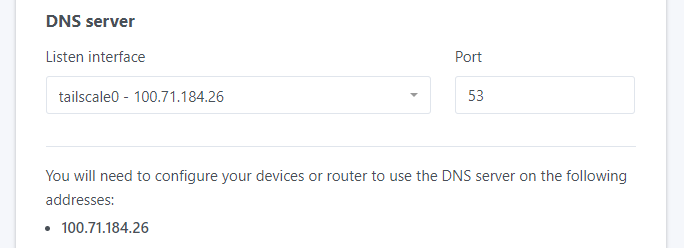
Now is the time to finish setting up AdGuard. Go to http://192.168.0.40:3000 to complete the installation of AdGuard. When you open the page, look at the DNS Server section. Listen interface set to “All Interface” might present an error as mentioned in the beginning of the tutorial.
From the drop down you should see a new interface - tailscale0
After this key step, everything else can be done as if you are setting up AdGuard normally. Proceed with user registration and so on.
If, for whatever reason, you don’t see the tailscale0 interface, reboot the AdGuard container.
If you have finished the AdGuard setup and chose an interface before setting up Tailscale, you will have to edit AdGuard’s configuration file manually.
Resetting AdGuard’s configuration:
The AdGuard config is located in /opt/AdGuardHome/AdGuardHome.yaml . If you delete the file and reboot the AdGuard container, then visit http://192.168.0.40:3000, you can start the setup process again with proper configuration. Execute the following in the AdGuard container console:
1
rm /opt/AdGuardHome/AdGuardHome.yaml
Editing AdGuard’s configuration file manually:
If you want to preserve the current configuration file for whatever reason (maybe you have already set up a bunch of rules), you can edit the /opt/AdGuardHome/AdGuardHome.yaml manually. Execute the following in the AdGuard container console:
1
nano /opt/AdGuardHome/AdGuardHome.yaml
Find the dns section at the top and under bind_hosts replace your local IP with the one provided by Tailscale:
...
dns:
  bind_hosts:
  - 100.71.184.26
  port: 53
...
Default Interface to listen to is your local network 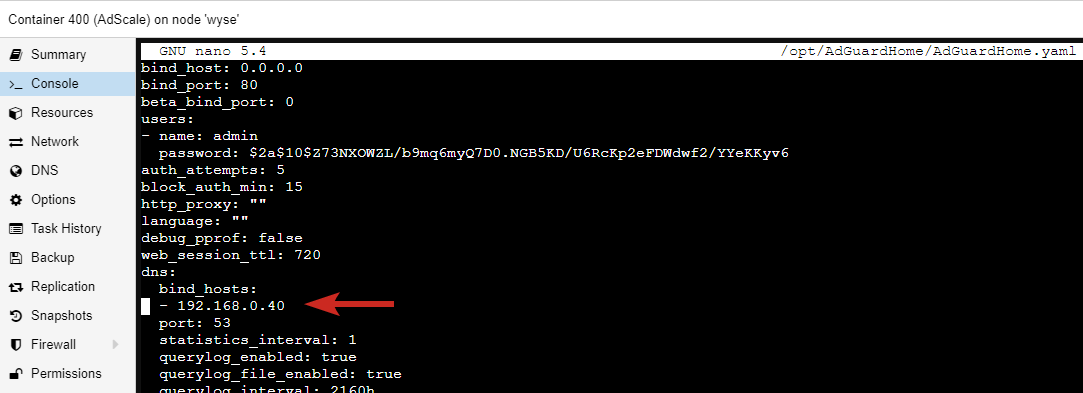
Changed default Interface to Tailscale’s network IP 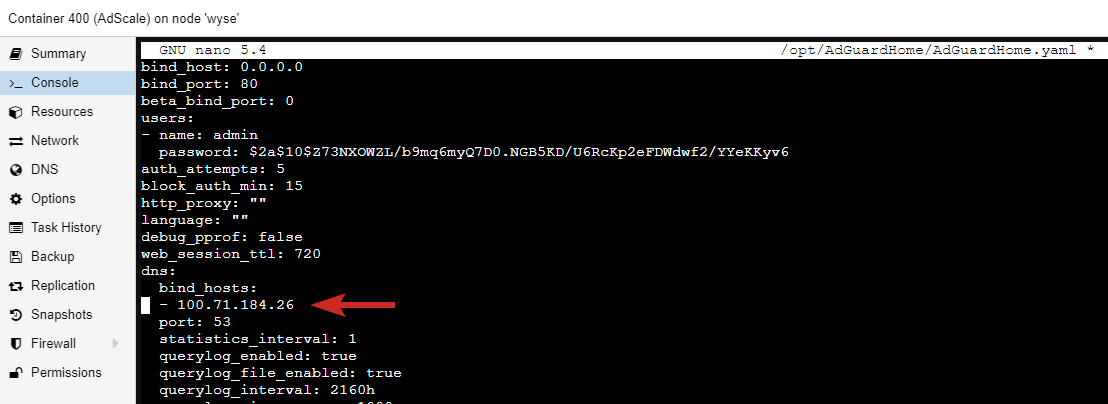
At this point you should have a working AdGuard that responds to DNS queries from your Tailnet. However AdGuard is still not the default DNS server for the Tailnet and also it has no DNS rewrite rules to point clients to your reverse proxy!
Step 5: Connecting everything
Setting up your Tailnet’s custom DNS server
When you login in your Tailscale Dashboard, you should see:
- AdGuard (with hostname “adscale”)
- The server running the reverse-proxy (with hostname “docker” in this case)
- Other clients you own
Sample list of connected clients
Take note of the AdGuard (adscale) IP. From this point on, we will be working with IPs inside the Tailnet. These IPs start with 100.X.X.X.
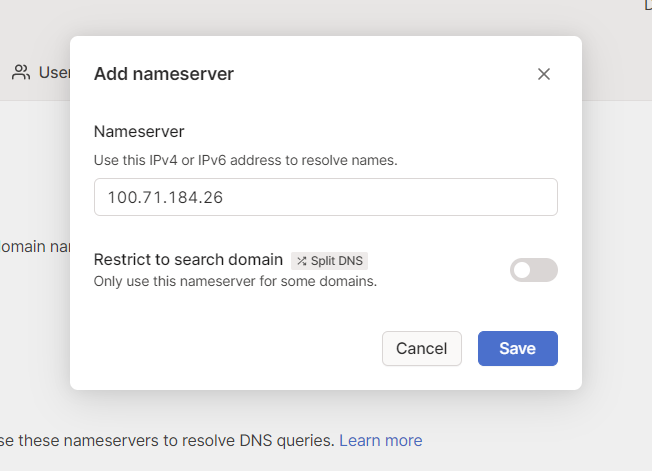
In the DNS Tab, under Nameservers, click Add Nameserver and choose Custom… Paste your AdGuard IP in the field.
To make sure your_domain.com is resolved by your DNS server every time, we want to force all of the traffic through the Tailnet.
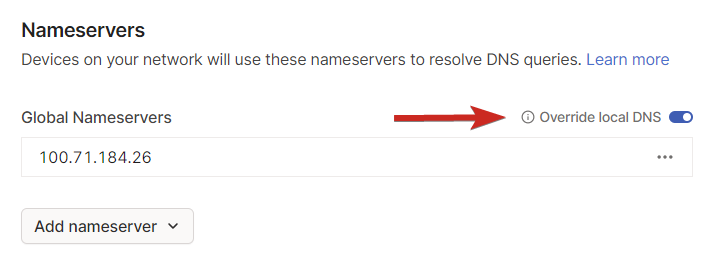
Now, you might have noticed that there is an option called “Split DNS”. If you enable it for your_domain.com and go to google.com, Tailscale will not use your DNS to resolve it. It will only use it for your_domain.com. But there lies a problem. You cannot have a “Split DNS” that resolves just one domain and “Override local DNS” because no other domain will be resolvable. Tailscale does not allow you to do that. If you want to enable “Split DNS”, you have to provide at least one more DNS server - like Cloudflare’s 1.1.1.1.
Setting up DNS Rewrites in AdGuard
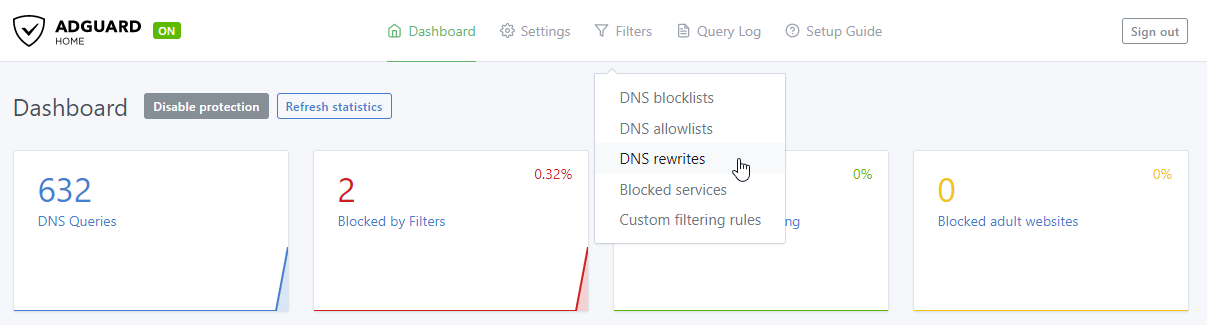
Creating DNS rewrites in AdGuard is straightforward - go to the dashboard, then go to Filters > DNS Rewrite. As I mentioned, we are working within the Tailscale network and therefore we are using Tailnet IPs. Take note of the server IP (“docker” in this case). It’s 100.84.51.113
You have to add two records. The first one is for your_domain.com, the second one is to point ANY subdomain of your your_domain.com to the server with Wildcard (*) symbol.

Additionally, you can add whatever blocklists you want, in order to use AdGuard for its intended purpose - ad-blocking but within the Tailnet.